The Premise.
Over the weekend I stumbled upon a great article that explained how to post to your blog each day automatically from your delicious account. the original post is here, However, it is several years old, and is in need of an update, even the layout of the delicious site has changed dramatically since it was published back in 2006. I searched around Google for a bit to find several other articles, equally or more-so outdated, explaining the process and linking to wordpress plugins that were outdated to the point of not working. Which is why I decided to write this quick tutorial, since it seemed as though I wandered far off the beaten trail to get the desired result, when it should have been explained a little better.
What does it post?
The blog posts formatting themselves arent much to look at, but hey, its automated, and its got all the content you need for a solid blog post, with a little love and some CSS styling on the ‘.delicious’ class you are all set!
How do I get started?
Keep on reading my friend
*NOTE* This only works for *hosted* WordPress Blogs (tested on v2.6)
First, Login to delicious
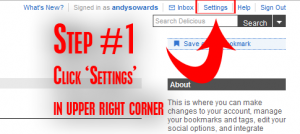
Now, You click on the ‘settings’ link in the top upper right side of the page, as explained in the image to the right.
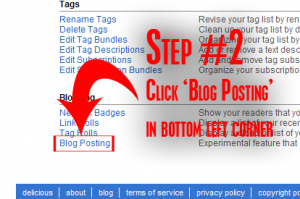
Once you do this, you will be greeted by your ‘account settings’ page with a myriad of options(have not explored them all yet). But if you look down at the very bottom left corner of the page you will see a link called ‘Blog Posting’. Click it as the image below suggests.
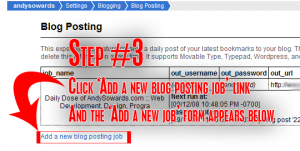
Now, You are now on the page that sets up the magical cron job.
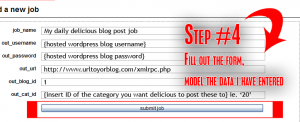
There is a link that says ‘Add a new blog posting job’ just as you see it in the image to the right. Click on this link and a form will appear, once you fill out this form by modeling the information I have filled it out with in the image below, submit it, and it will be good to go, but we are not done yet, thats where the confusion set in for me over the weekend.
Next, Login to your WordPress Blog Admin
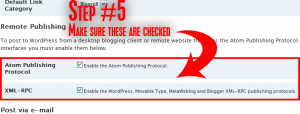
Once you are in your wordpress blog admin, you want to click on ‘Settings’ -> ‘Writing’ and scroll down to the section called ‘Remote Publishing’ and you want to make sure that both ‘Atom Publishing Protocol’ and ‘XML-RPC’ are checked. Make sure it looks like the image to the right.
Once you have made the change, be sure to scroll down to the bottom and ‘Save Changes’ or else this will not take place, and when delicious tries to post to your blog, it will be denied, and you will be Angry! >:(
Whenever mine get posted to my blog, I will edit it, and style it up to where it looks a little nicer, but it really helps to have all those links already in there for you!
Hope you enjoy this, Give me some comments and let me know if you need any help, or have any suggestions! All will be appreciated!




Man your blog design is intense! I like it.. reminds me of a heavy metal mag.. good post too – automation rocks
Very KICKASS sir.. Thanks for the tutorial
Yup thats what ya gotta do
Thanks’ Andy
I have setup the cron job with Delicious manually , so i will stand by and hope for the best. (-: